fine art

4-Day Galaxy Skies Challenge

As part of my effort to light a fire under my butt to paint more often, I decided to participate in a 4-day galaxy skies painting challenge that I saw on SkillShare with artist Swathi Ganesha. Click here if you’d like to try a month of SkillShare for free.

Day 1: Monochrome

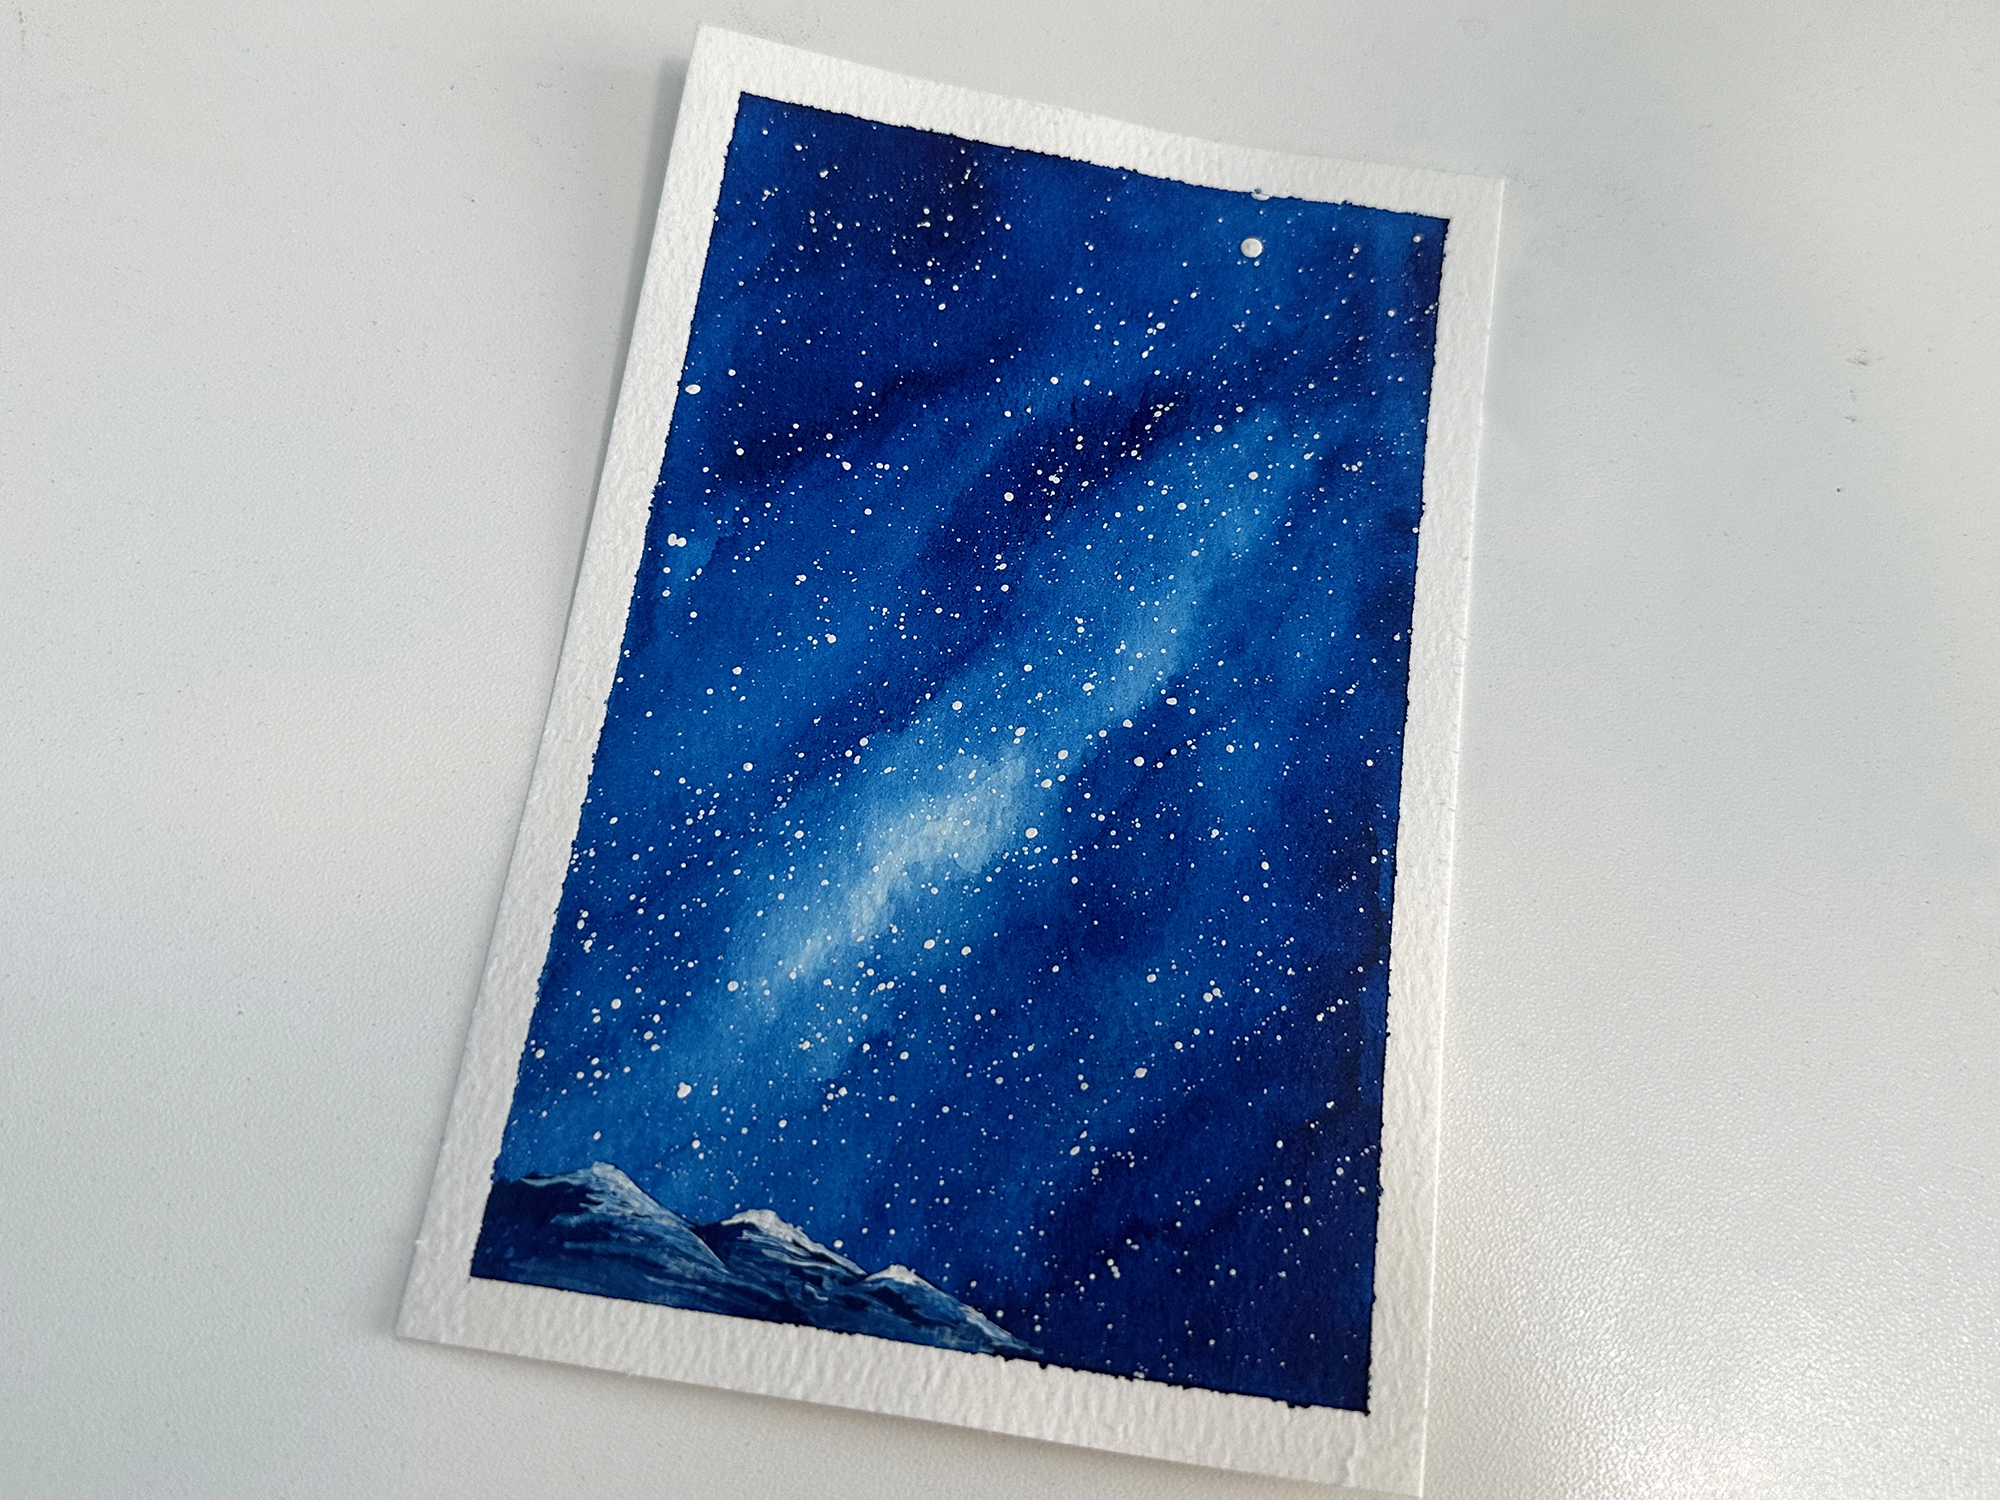
Day One was a monochrome painting, so just one color. I chose Phthalo Blue from Daniel Smith Watercolor and went to town making a basic diagonal edge to the Milky Way. There was something very freeing about doing all I could with just one color. Click here to watch a time lapse of this painting. A couple of tiny mountains at the bottom added some depth to this one.

I painted the stars using white gouache paint and a splatter method where I tap two brushes together. This is a method I used a lot when I was doing galaxy-dyed shoes and baby carriers a few years ago. I would use acrylic paint and it gave the most awesome and varied sizes of stars, but I had very little control over where they landed, and sometimes I’d end up with an odd-shaped glob of paint that wasn’t round. Also, paint ended up everywhere! Those reasons are why I originally used masking fluid and white pens to make stars for my watercolor paintings, but after using this splatter method again, and with gouache this time, I think it’s going to help me level-up on my galaxy stars.

I have an awesome set of gouache paints from Himi that my sister gave me for Christmas.

Day 2: Duo Chrome

Day Two was Duo Chrome, so two colors. I opted for Phthalo Blue again and added Quinacridone Rose. I haven’t been using very high quality paper for these; just a 4x6 pad that I got from Michael’s. Today the paper bowed down the middle when it was saturated and the paint was pooling along the bottom. I managed to dab the puddle with a tissue in an attempt to salvage it, but I almost tore it up and threw it away. Once I added stars, the painting redeemed itself.

I added a few happy trees and I was happy with how it ended up. Click here to watch the time lapse of this one.

Day 3: Three-Color Seascape

Day three; a three-color seascape, proved to be the most challenging. I have a palette of watercolor from Culture Hustle that I tried to use for all three colors. The lavender and turquoise just weren’t pigmented enough. So attempt one went into the trash. With attempt number two, I tried to use Phthalo Green straight for the aqua shade along the bottom, but it was way too green and I scrapped that one too.

For attempt number three, I premixed that aqua color using Phthalo Green and Cobalt Blue. Then I used Imperial Purple and the bright pink called Runaway from the Culture Hustle Watercolour Palette. I absolutely hated how the colors were coming together when they were wet. But once it dried and I added stars, it was worth saving. After adding some more definition in the ocean at the bottom, it avoided the recycling bin.

Click here to watch a time lapse of this painting.

Day 4: Dreamy Landscape

Day four was fun because I could use pretty much anything I wanted. I chose to limit myself to only four colors: Indigo, Moonglow (that purple shade), Phthalo Green, and Cobalt Blue. These colors are more muted than the ones I used before, but I still love how they turned out. This time the paper was cooperative and I was happy with how the paint behaved. I tried to be more patient and waited longer after applying paint to see how it spread and I think it paid off.

I opted for a few more happy trees and I love how it turned out. Click here to watch the time lapse of this one being painted.

I had such a fun time with this challenge, maybe I’ll do it again next week but with all different colors. Maybe if I can paint enough of these little paintings, I can have them for sale.

Milky Way Over Sundial Peak & Winter Blues

Sundial Peak Watercolor

There’s something to be said about noticing when you’re in a funk and acknowledging that it’s okay and just rolling with it. I first noticed it with my kids. We’re all cranky and mornings are tougher than usual. I told them both that it’s normal for this time of year. The holidays are over, it’s cold, it’s dark, and spring and summer feel a million years away. It feels like there’s nothing to look forward to like we had in November and December. My kids and I have deemed it the Winter Blues.

*Not to be confused with actual depression. Seasonal depression is real too, and I dunno, maybe I get a touch of it this time of year?

Somehow, acknowledging that we’re all feeling it made it suck a little less. We are hanging in there and simultaneously enjoying the snow we’re getting and also anxious for spring to get here.

Last week I realized I hadn’t done any painting since the end of December. And before that, I hadn’t painted since August. I had no motivation or inspiration; which sucks because I live in such a beautiful state!

Imposter Syndrome loves these moments and chimes in with little tidbits that sound like, “you aren’t skilled enough to paint that,” “don’t even start painting that, you won’t finish it,” and the ever popular, “paint that and everyone will learn how awful/fake/not-a-real-artist you are.” She’s a sneaky bitch.

Last summer, during one of my weekend shows, a guy asked how I made the stars on my Milky Way paintings. I told him that I was trying out different techniques as I went; some I used masking fluid, some I used white ink, some I used both. He commented that on a couple, it was hard to tell if I was going for stars or snow. I took no offense because his comment came from a place of pure analysis, but it did make me think. A few of my paintings are small, 8x10 or smaller. So when I’m using masking fluid, it can be more challenging to paint smaller stars if; especially if I’m just flinging masking fluid off of a brush.

One such painting was this one of Sundial Peak and Lake Blanche. This is a local mountain to me and one I am hoping to hike or backpack to this summer. The first time I painted it, I used masking fluid to make the stars. I splattered it on the page and then erased it off when the painting was done. It acts similarly to rubber cement. This original is maybe 8x10 inches, and I didn’t have the patience to make smaller stars by using a tiny brush and doing one at a time. You can watch a time lapse video of how I made this painting here.

I wanted to repaint this mountain on larger paper and see what I could come up with. This version has a bit more snow, more sky, and less of Lake Blanche. I skipped using masking fluid this time and made all of the stars with white pens.

This one took me more than a few days. I would paint a small part and step away for a day or two before coming back to it. I wasn’t thrilled with the mountains, feeling like they lacked some depth. Then I wasn’t happy with parts of the sky; the blues not inky enough. I wasn’t sure how I wanted to show the little bit of Lake Blanche that shows at the bottom. The reference images I had showed dark green spots where it was iced over.

I overthought this one a lot. Heck, I still am. I already know a few spots I want to change in Photoshop; like that stripe of snow down the middle that I didn’t intend to go almost perfectly vertical, LOL. I’ll scan this one and make it into prints and stickers…. after I’m happy with it.

Here you can watch the time lapse of how it was made.

Here’s a list of the supplies I used; including links. Some are affiliate links.

…and the desk lamp that also holds my iPhone so I can make these cool videos.

What should I paint next?? I really want to paint locations that are outside of Utah, but I don’t love painting the same views of the most popular spots that everyone takes photos of. I kinda want to continue with public lands and National Parks too. Decisions…

I Bought a Mat Cutter!

One day, 20-ish years ago, my BFF Yvonne knew I was looking for a job after being fired from the last one (long story there). She came over and wouldn’t leave until I filled out an application to work at the picture framing store where she was a manager. She knew I would love the work, and I really did. I alternated between full-time and part-time, depending on my school schedule, for about five years at a Bay Area chain called Corners.

For the first few years, we did everything in-house. We cut and joined frames, cut mats, stretched canvas, built shadowboxes, we did it all. I learned how to lay out and cut multi-opening mats. I learned how to sew down an antique christening gown or an autographed football jersey without using any tape or glue. I built shadowboxes for military medals, antique coins, musical instruments, and even a few license plates. I stretched canvases that were up to eight feet long and cut frames to fit. It was such a FUN job.

The sales side wasn’t always fun; especially with customers who had no idea how expensive custom framing is. But my favorite times were the weeks leading up to Christmas. We’d have hundreds of orders to finish before the holiday, so we’d get overtime approved, crank up the music after the store closed, and get it all finished without interruption. I have lots of fond memories of singing and dancing and making some wonderful friends.

I have thoroughly loved framing different things for my home. I may have old, cheap, and mis-matched furniture, but there’s never a shortage of framed photos and artwork to hang on my walls and lots of artwork and empty frames waiting for a larger house to adorn someday.

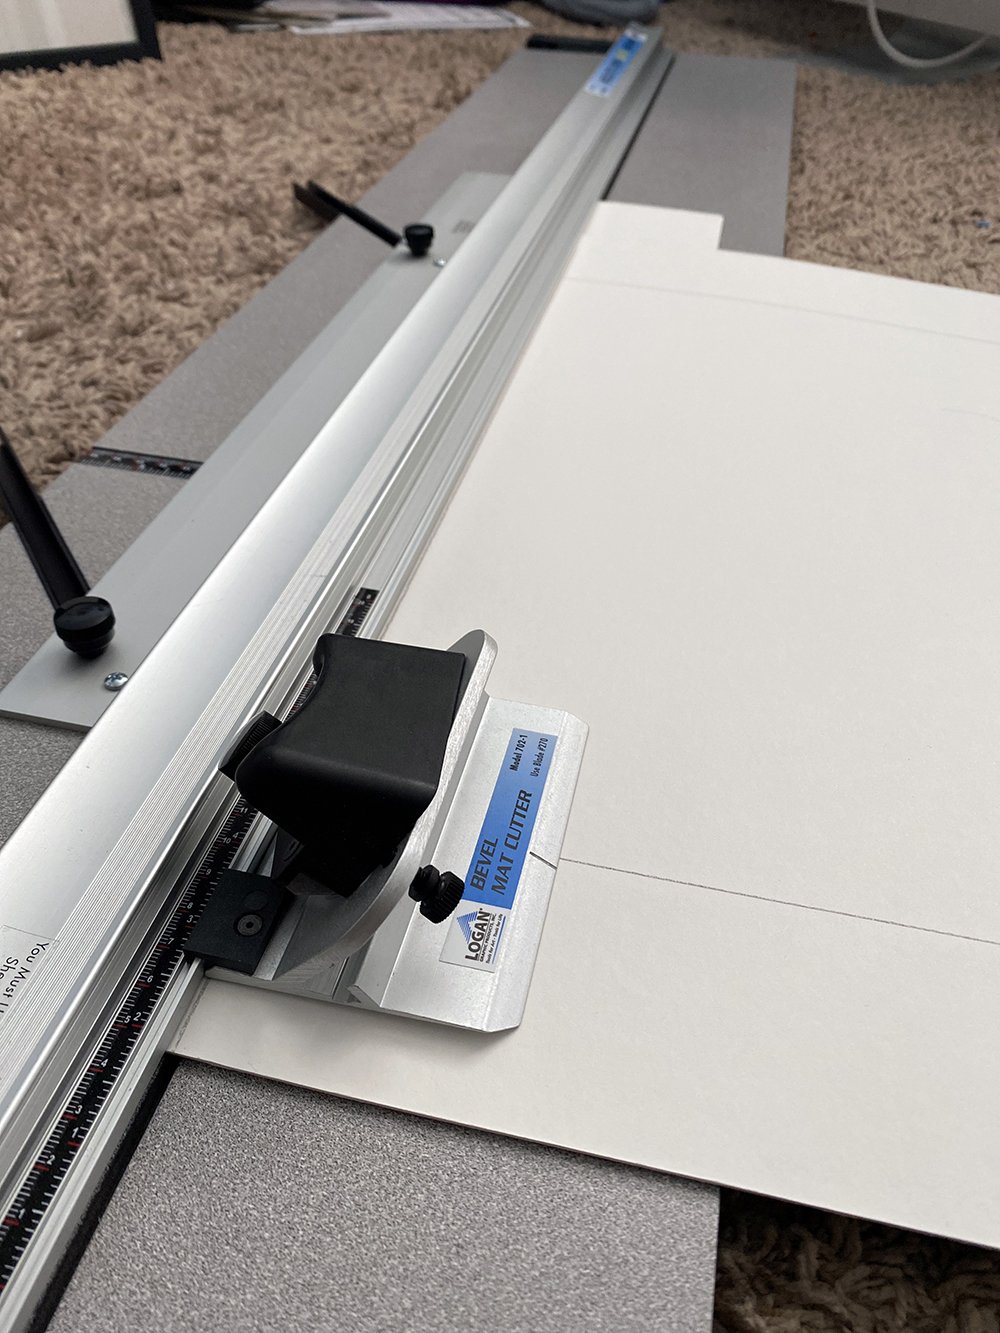
Last Christmas, I splurged and bought myself a mat cutter. A few times I paid way too much at JoAnn’s for a custom mat to fit a ready-made frame and it was so difficult to justify paying that much when I knew I could do it myself. Of course, my house is small, so I don’t really have anywhere to put it other than the floor of my office/studio.

First thing I cut a mat for??

I framed Kukkiwon 1st degree black belt certificates for my son and myself. We worked our butts off to earn those and they deserved to be displayed with pride.

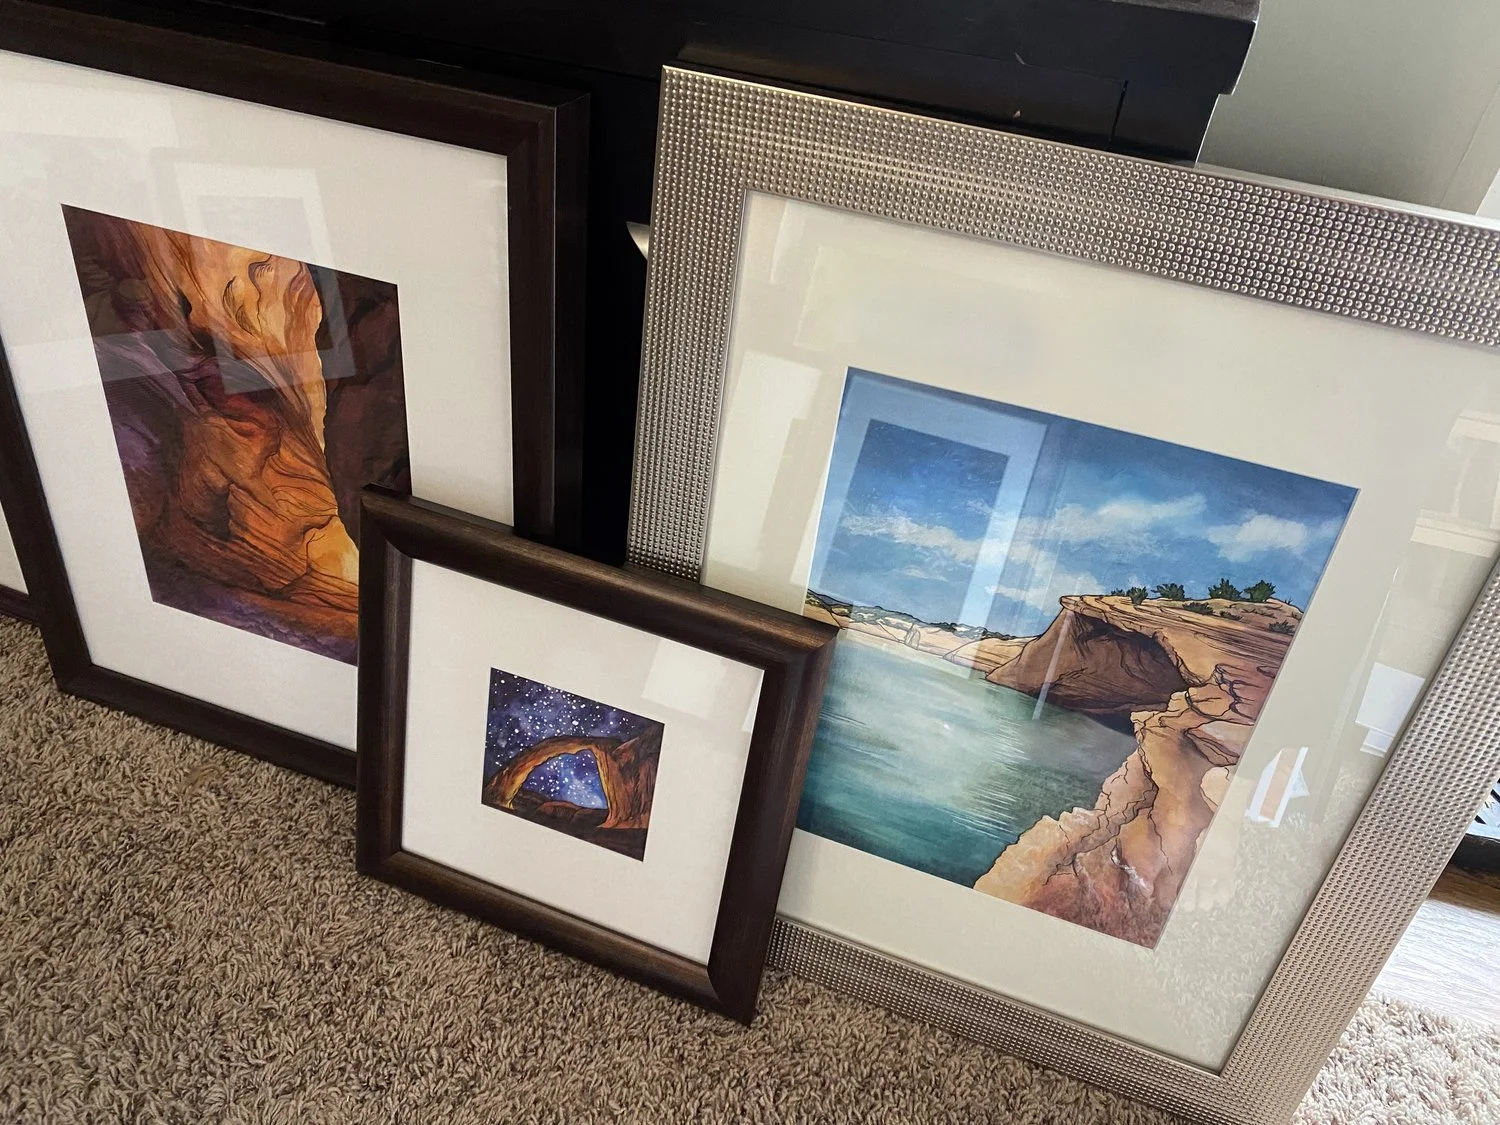
The next things I cut mats for were my own paintings and prints for my exhibition at Draper’s Art in the Barn, Draper’s Internationals Arts & Crafts Festival, and the Sandy Visual Arts show. Being able to buy full sheets of mat board and cut all of my own mats proved to be a huge money-saving tool.

My knowledge and skill allowed me to cut mats to fit ready-made frames and save on custom framing AND have complete control over how they looked. When I chose mat colors for the exhibition and arts & crafts show, I kept the mats off-white and simple.

When I chose mats for the Sandy Visual Art show, I went with black to really make the colors in the paintings stand out; even though it’s wasn’t necessarily mat colors someone would choose to hang in their home.

I am SO glad I bought this gift for myself. I have so many pieces of artwork I bought from other artists I follow and I cannot wait to get matted and framed.

Next goal: Get a new house with a bigger studio/office space so I can have a whole table for my mat cutter.

New Stickers

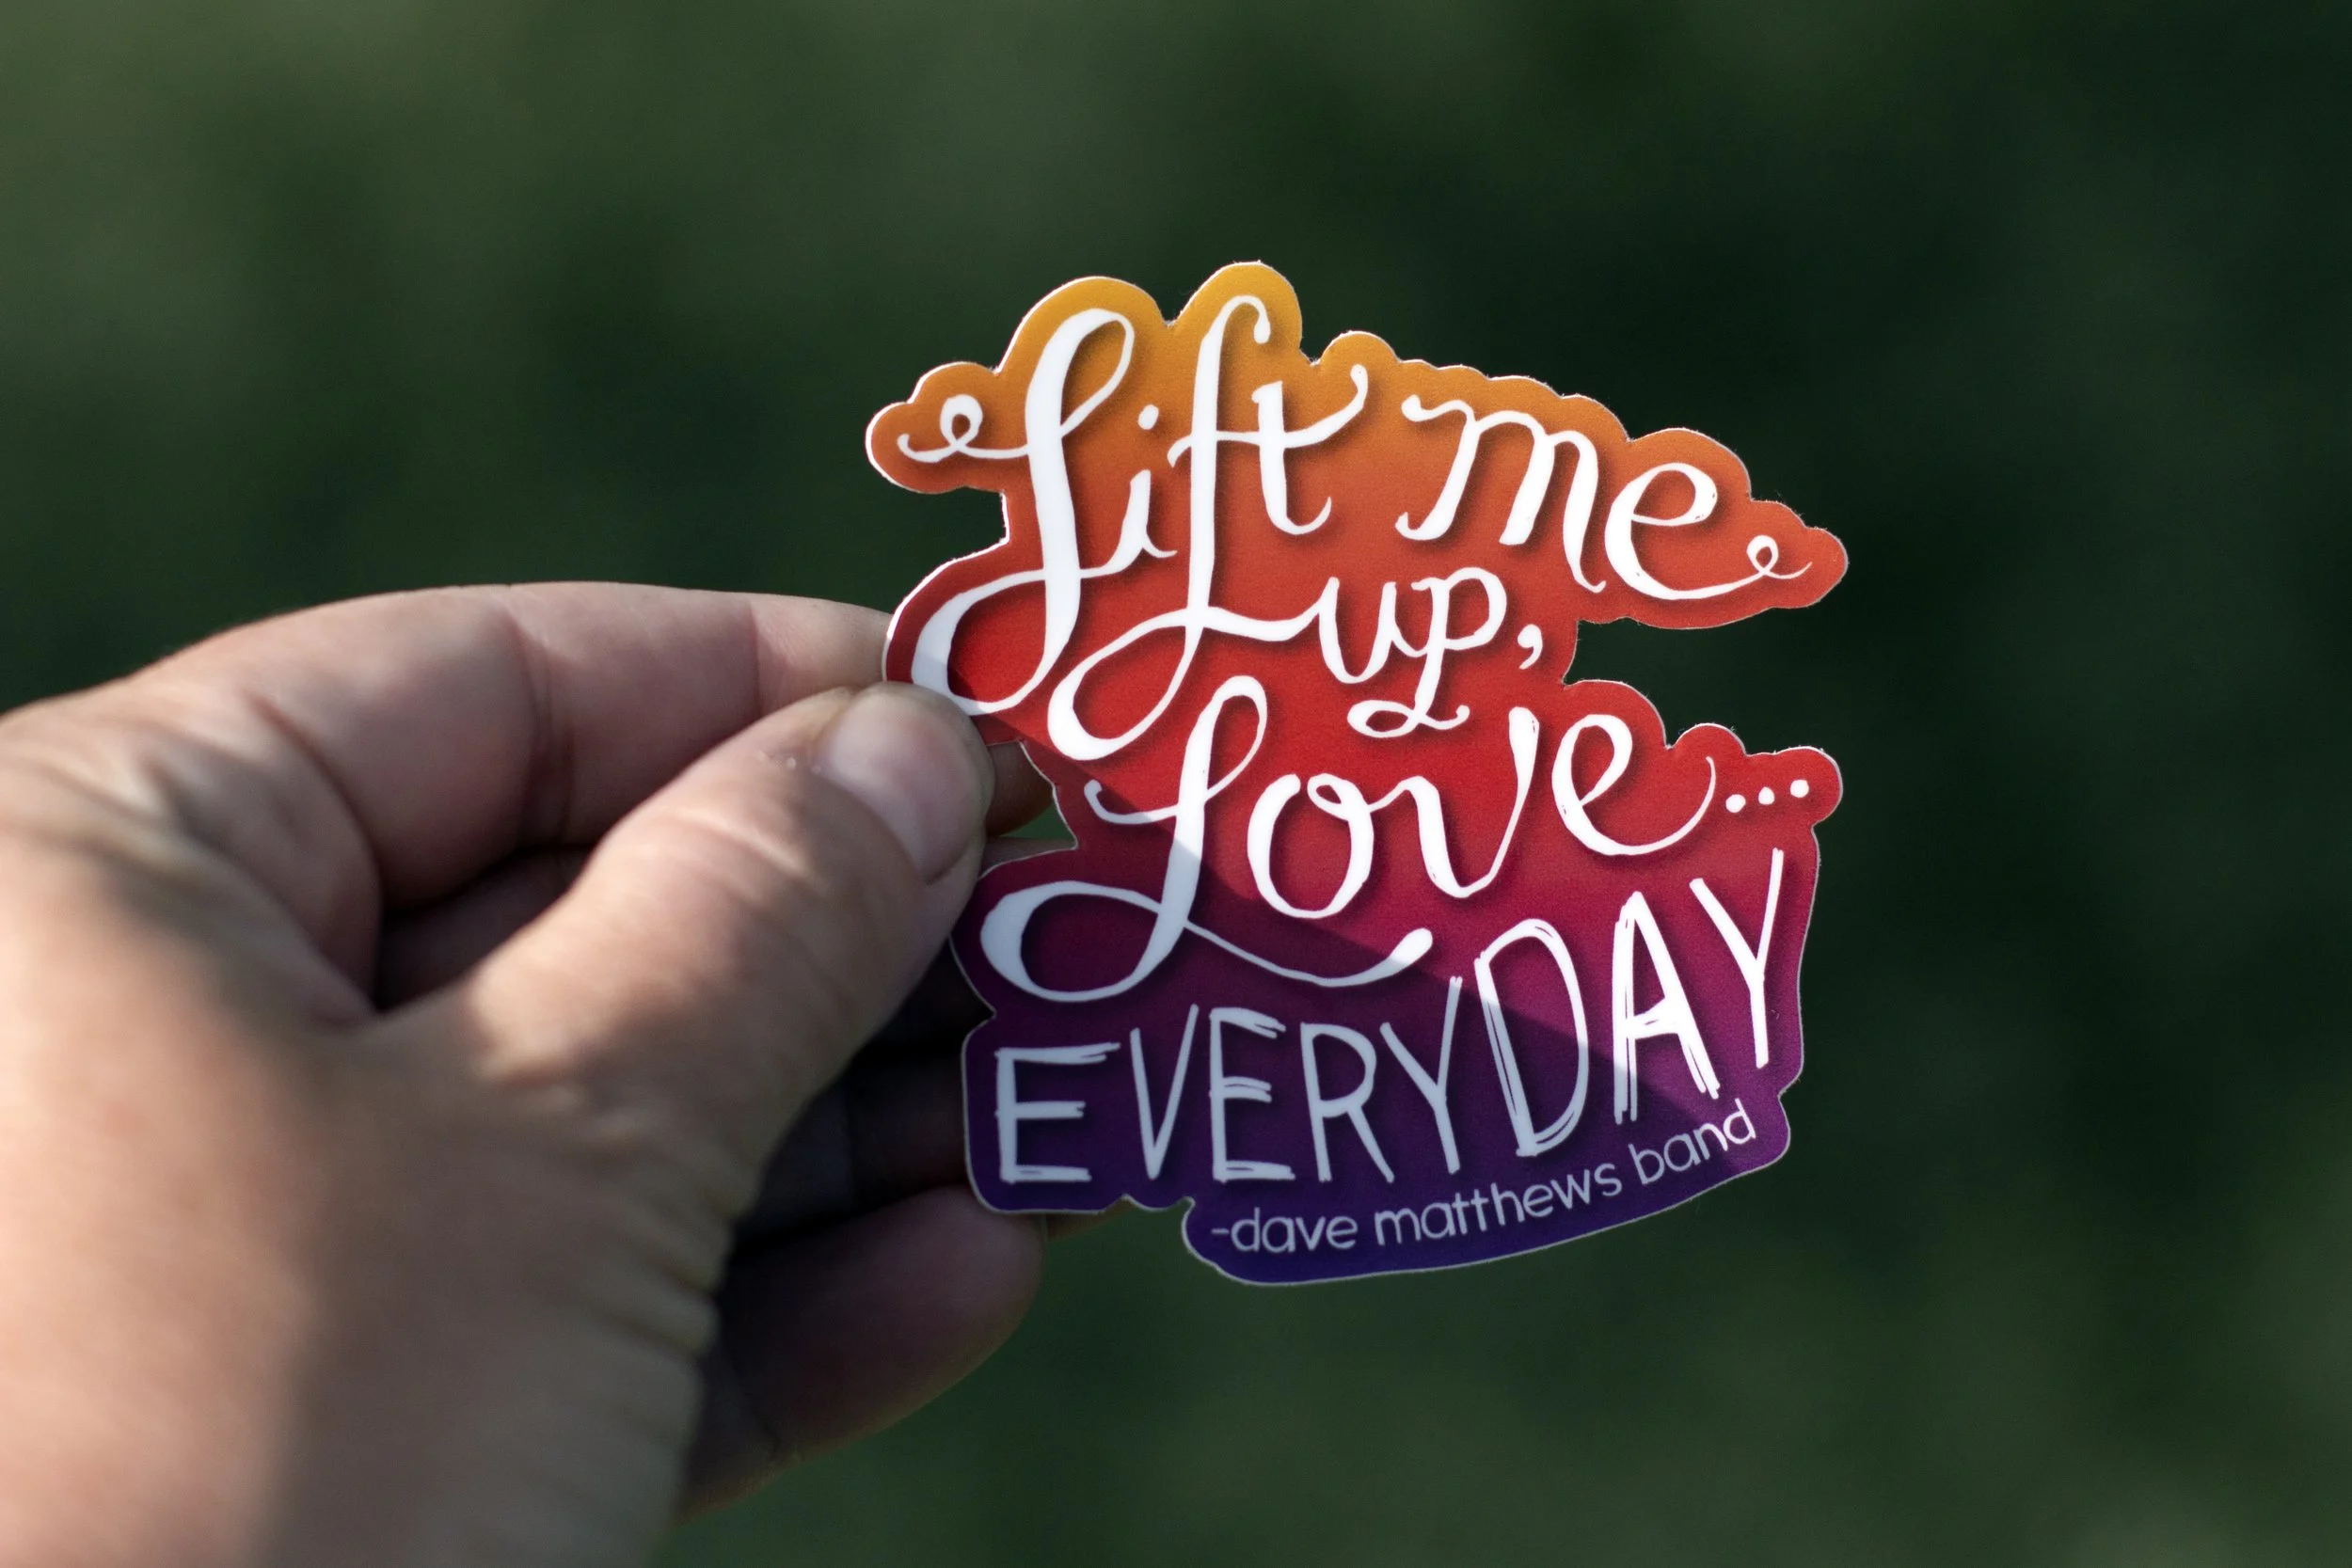
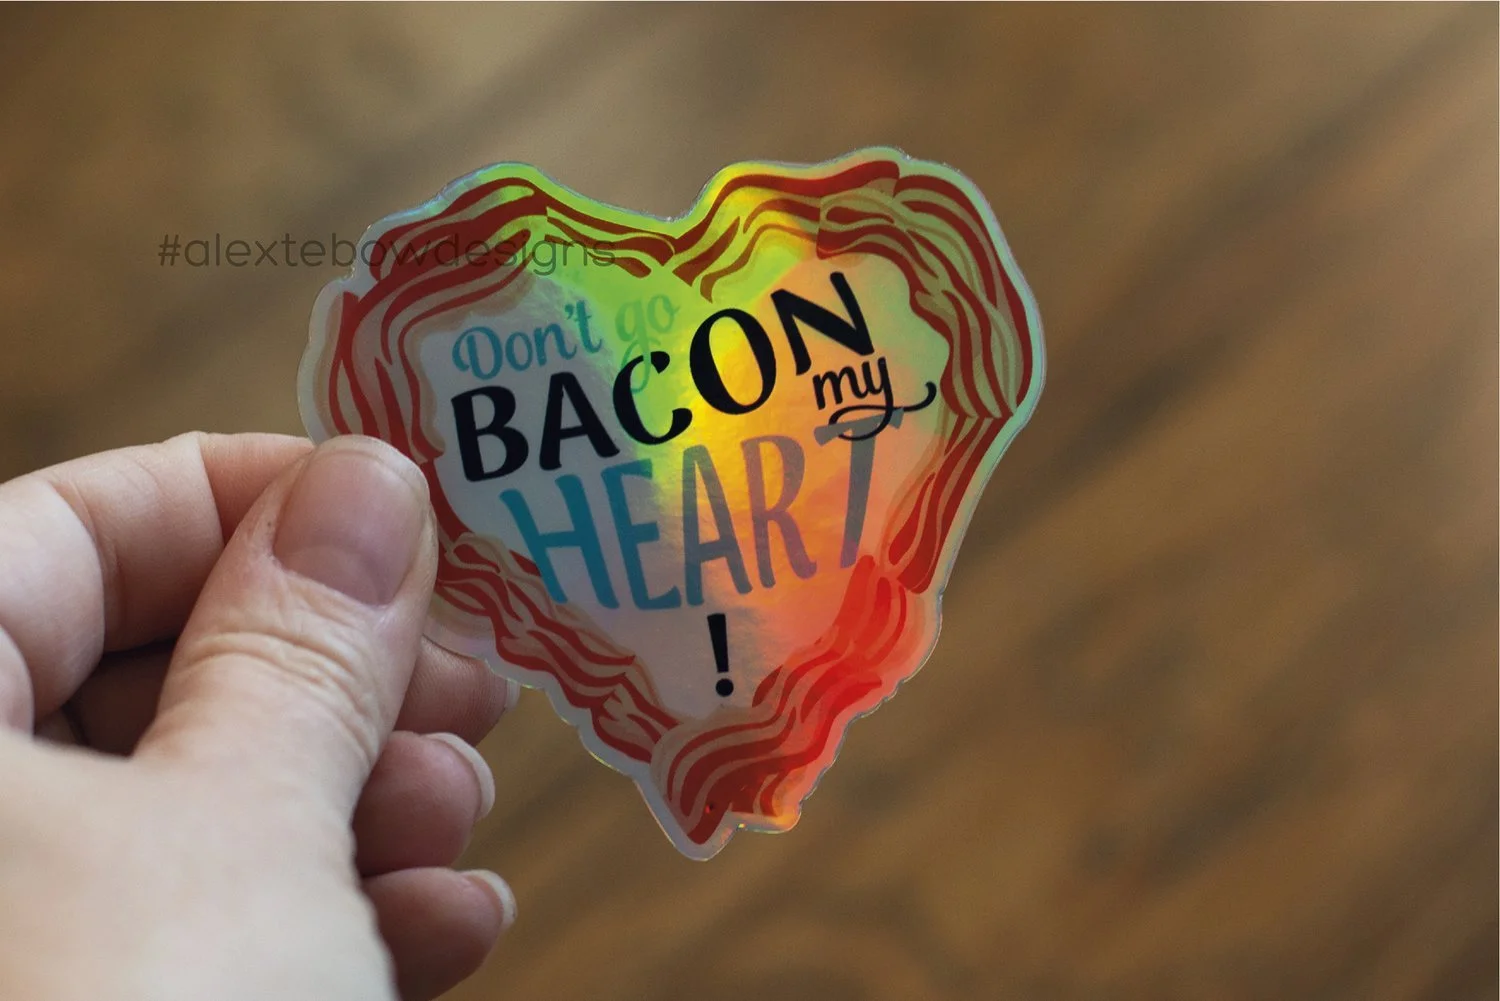
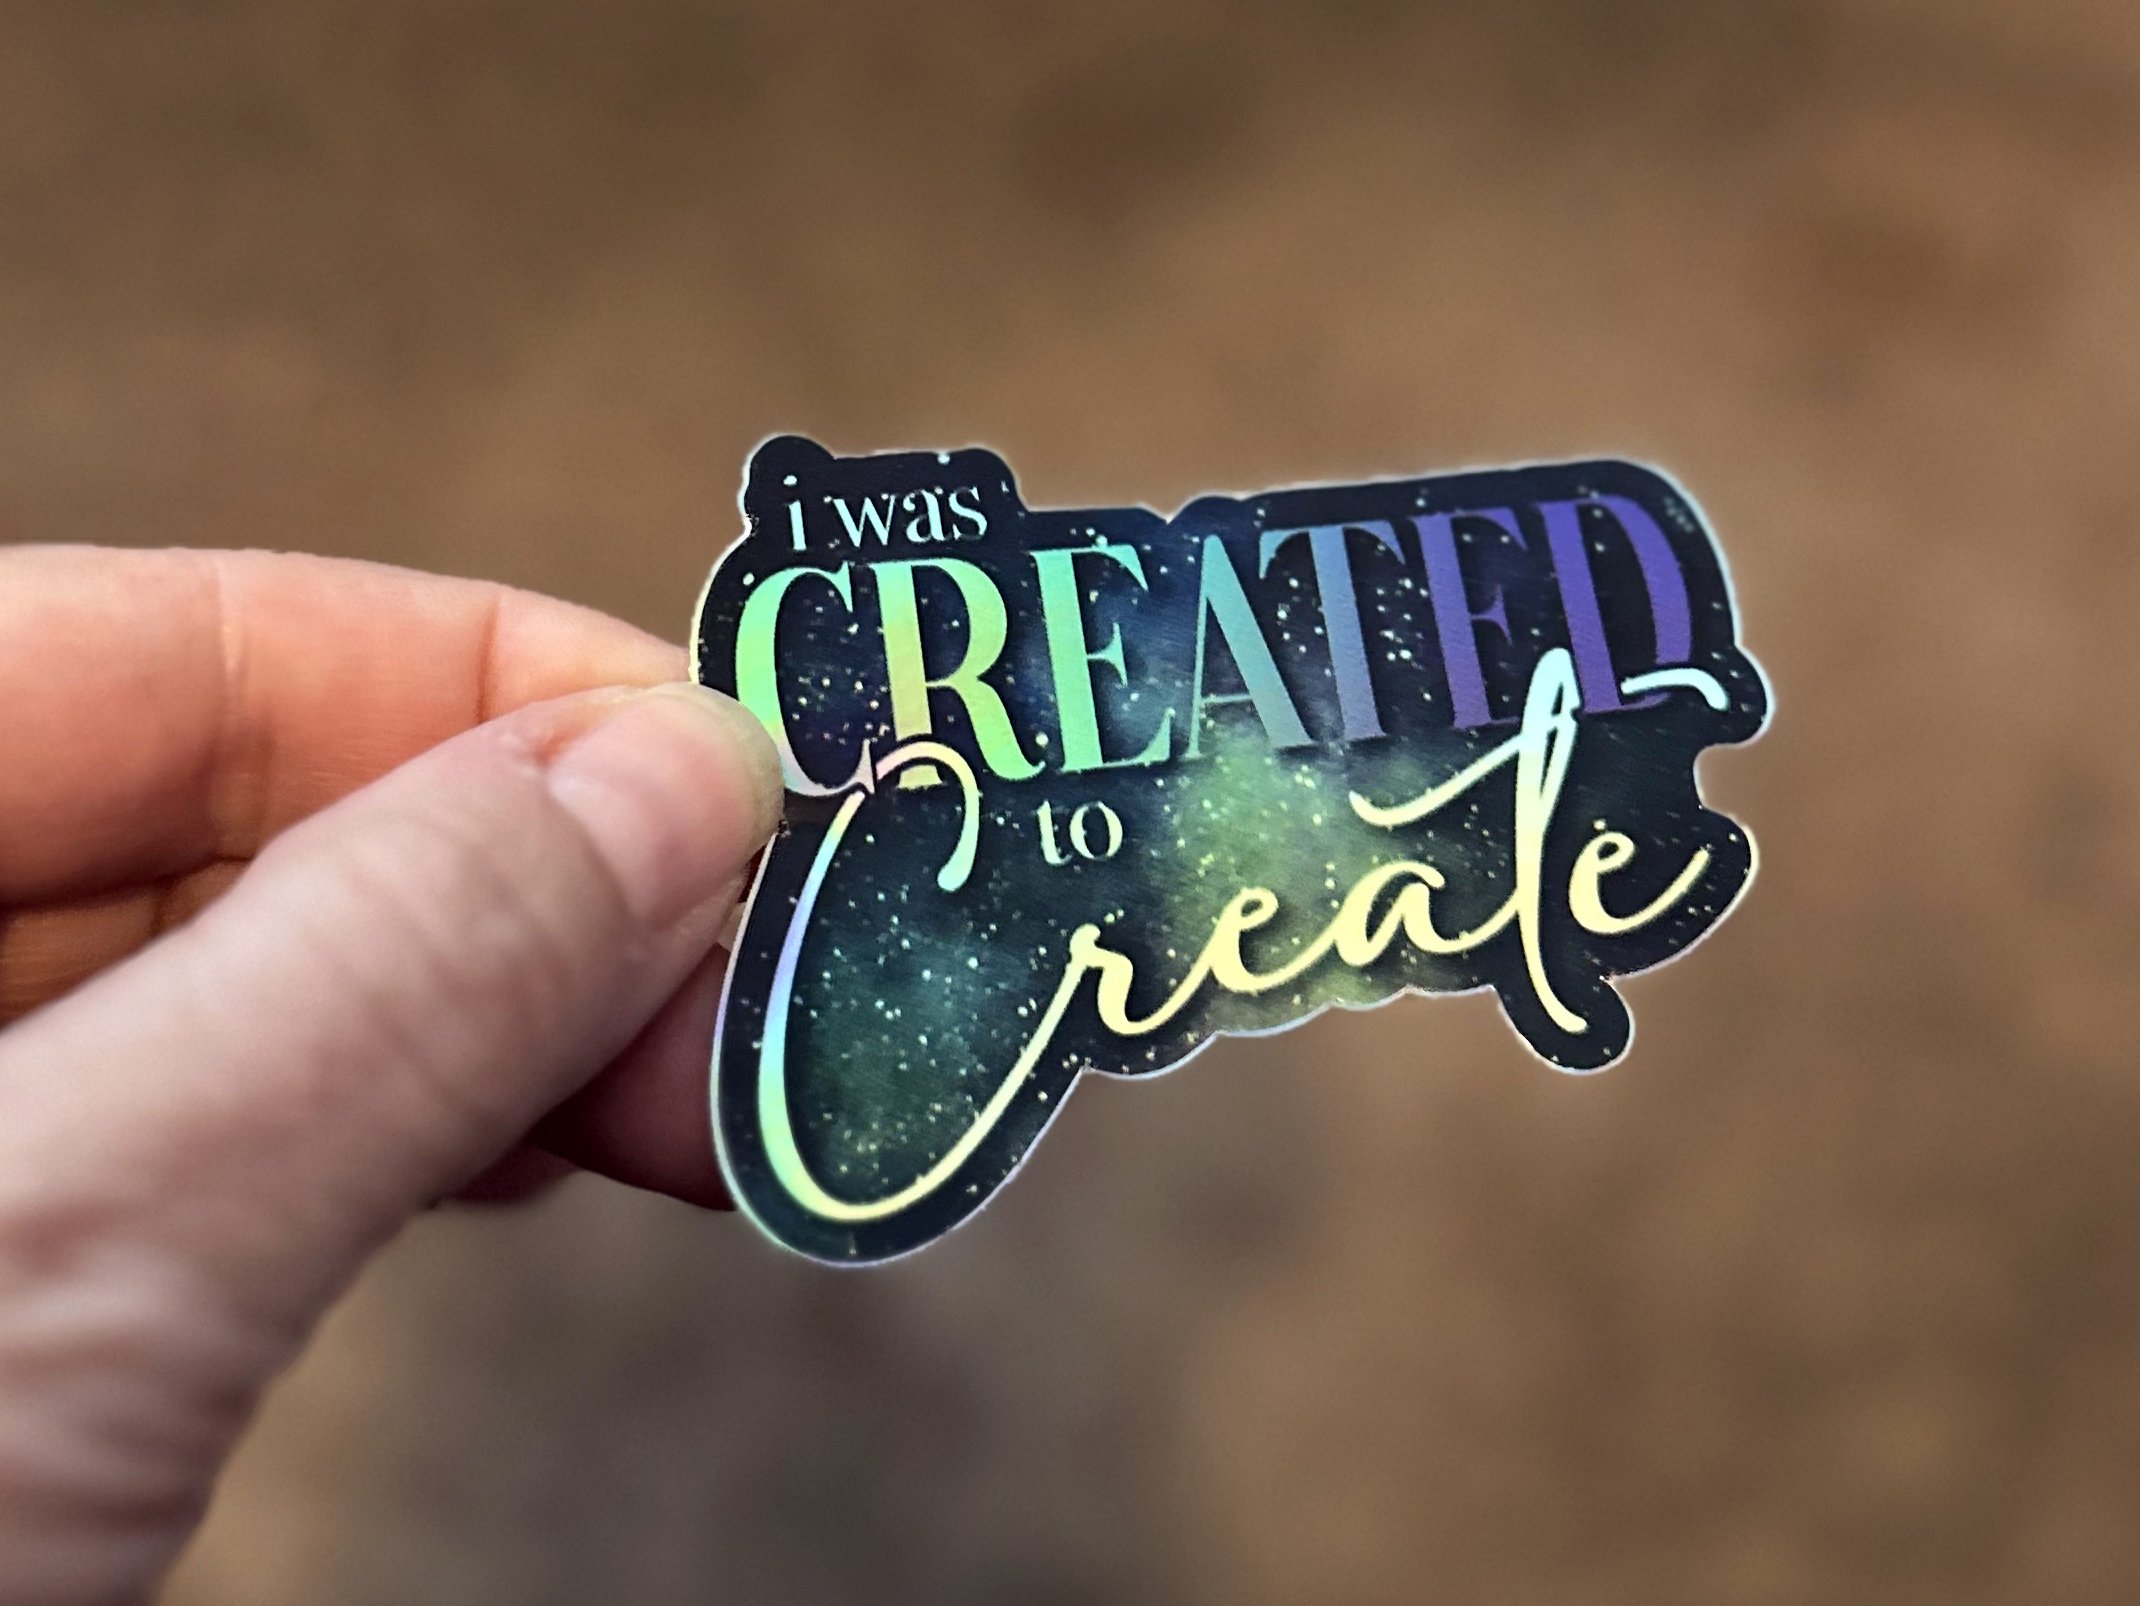
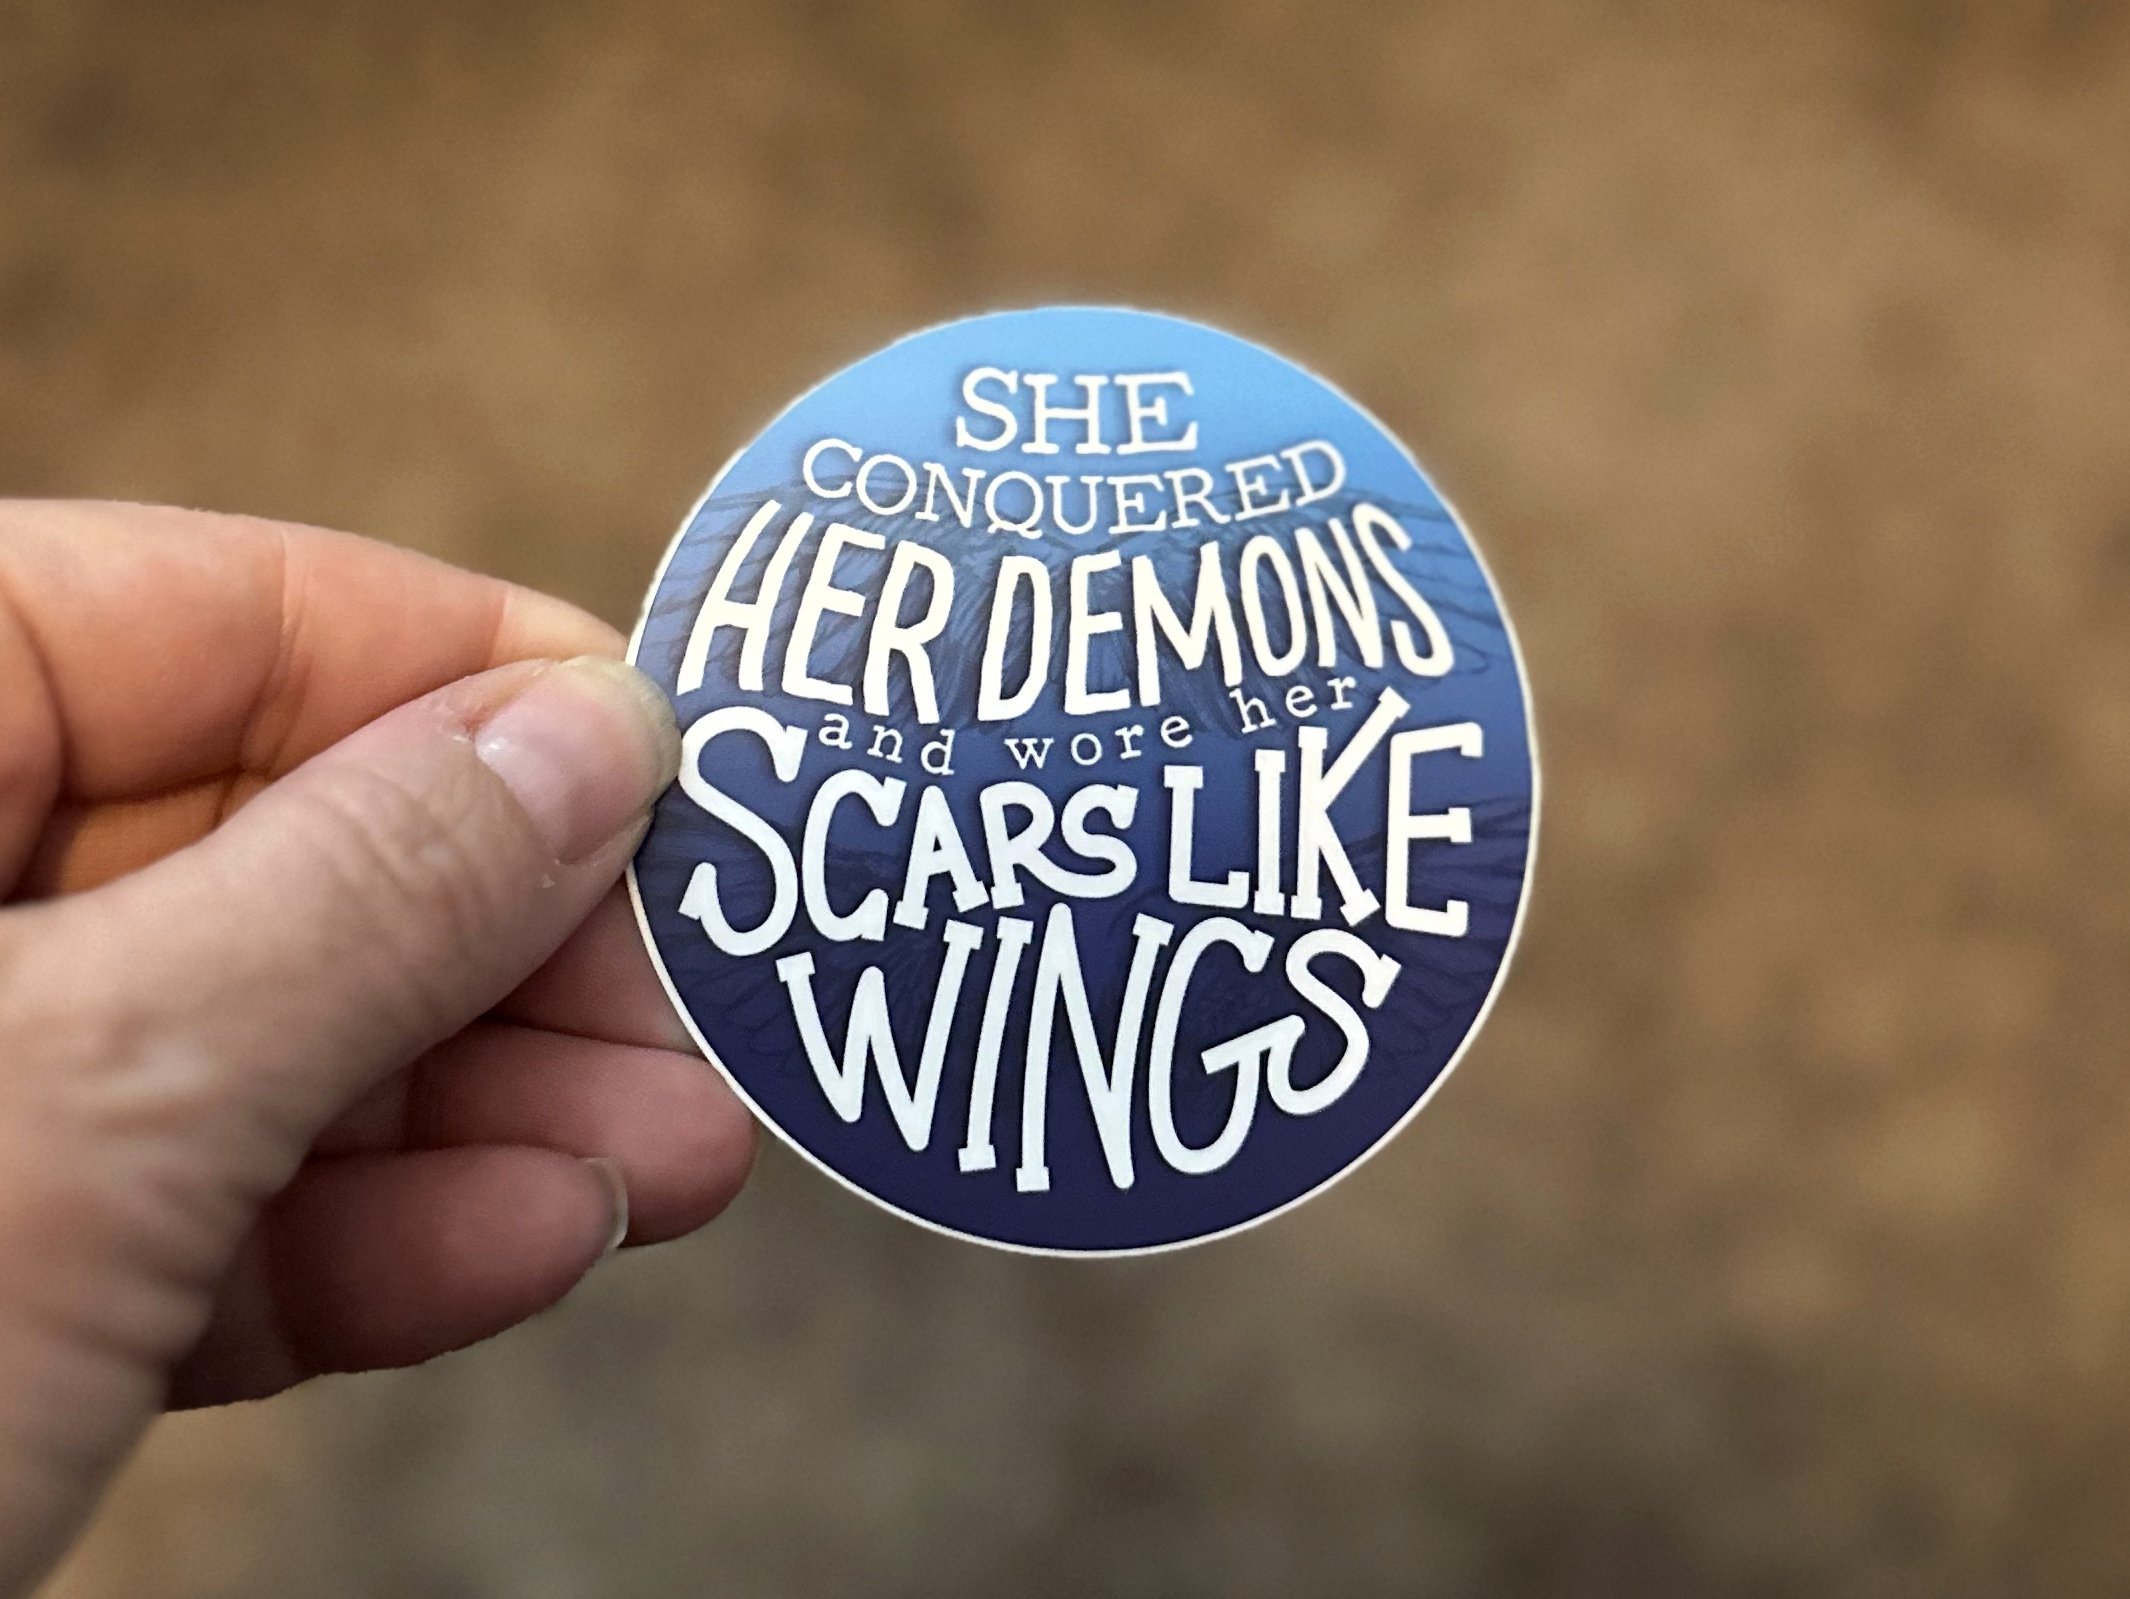
In preparation for having booth at a couple of local arts and craft last summer, I started creating stickers that were more wordy and graphic design-y; fun and inspirational and not a watercolor painting.

Here’s what I have at the moment:

This sticker is based on t-shirt artwork I created for a friend a few years ago. She’s a big fan of Dave Matthews Band and asked me to design a pair of t-shirts for her and her daughter. The daughter’s tee is done in the same hand-drawn style and says, “Pick me up, Love. Everyday.” I love how this one turned out. Buy one here!!

I created this sticker earlier this year for my youngest son’s school valentines. It was serendipitous timing that Sticker Mule had a sale on holographic stickers just in time for Valentine’s Day, so he helped me come up with a fun design and it was a winner! Buy one here!!

For this one, I loved the simple words and thought I’d see how it looked with a starry night sky in the background. I went with holographic stickers and I wasn’t thrilled with how it turned out, but the sticker was really popular at my booth over the summer. It’s always surprising what ends up being my favorite artwork as opposed to what other like best. Buy one here!!

This one I did super fast one day when Sticker Mule was having a sale. This saying had been on my list of ones to try and turn into a sticker at some point because it’s really beautiful. Lots of people bought this sticker with a loved one in mind. Buy one here!

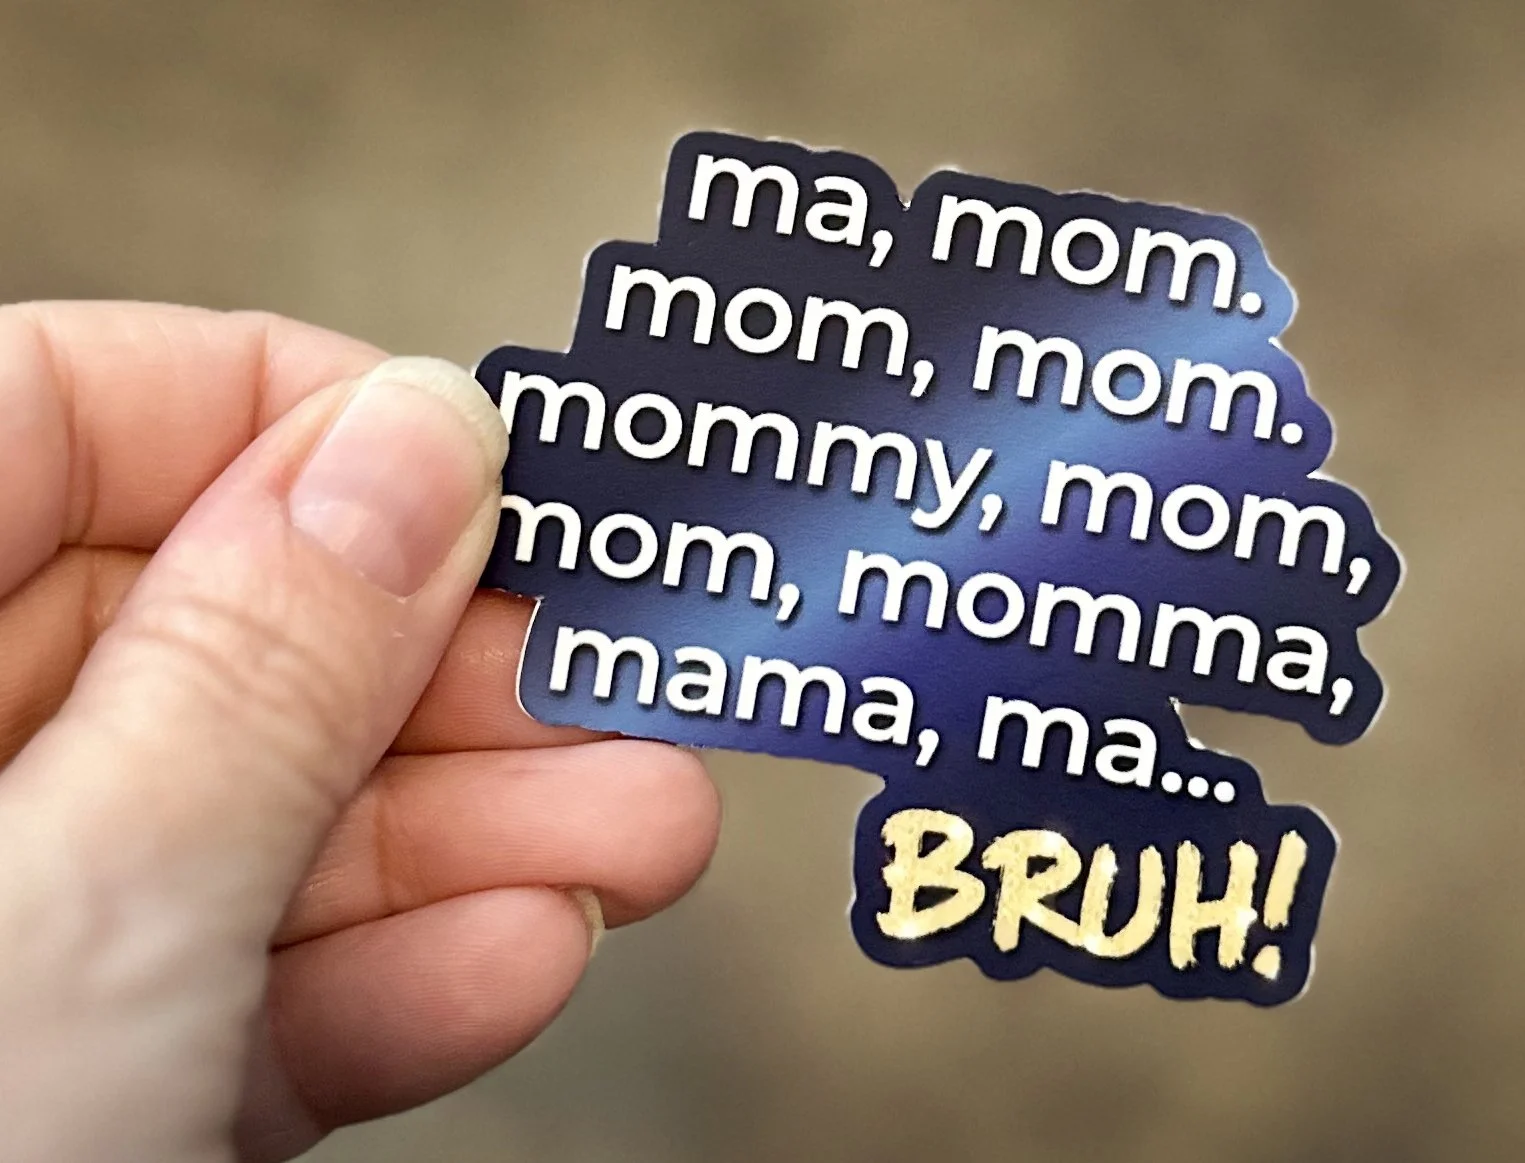
This sticker was all my husband. He and a coworker was commenting on how often our kids mistakenly call us “bruh.” It ticks me off when my kids do it to me. Buy one here!!

What are some ideas for future stickers???

2022 Sandy Visual Art Show

Right after the Draper International Arts & Crafts Festival, my husband sent me a link from the Sandy Arts Guild about their annual Visual Art Show. It’s a 2-week long art exhibition at the Sandy Senior Center where they award prizes to artists in different categories.

I was still riding high from the two booths I had this summer, so I went ahead and submitted two of my original paintings: Corona Arch & Milky Way and Buckskin Gulch. This was yet another moment where I was grateful for my experience working as a picture framer years ago. I was able to cut custom mats for my paintings and make them look professionally framed. I was able to list both paintings for sale, and it gave me peace of mind to know that, on the HIGHLY UNLIKELY chance that someone buys one, they are framed beautifully.

My kids were more than thrilled to help me bring my two paintings to the show and help me get the paperwork together.

Sandy Visual Arts Show

Click on the image to watch the Reel.

The opening of the show was last week and friends and family members of the artists were invited to attend where they announced the winners in each category. Categories were: oil & acrylic, watercolor, mixed media, 3D art, photography. They also gave awards to artists with disabilities who submitted artwork.

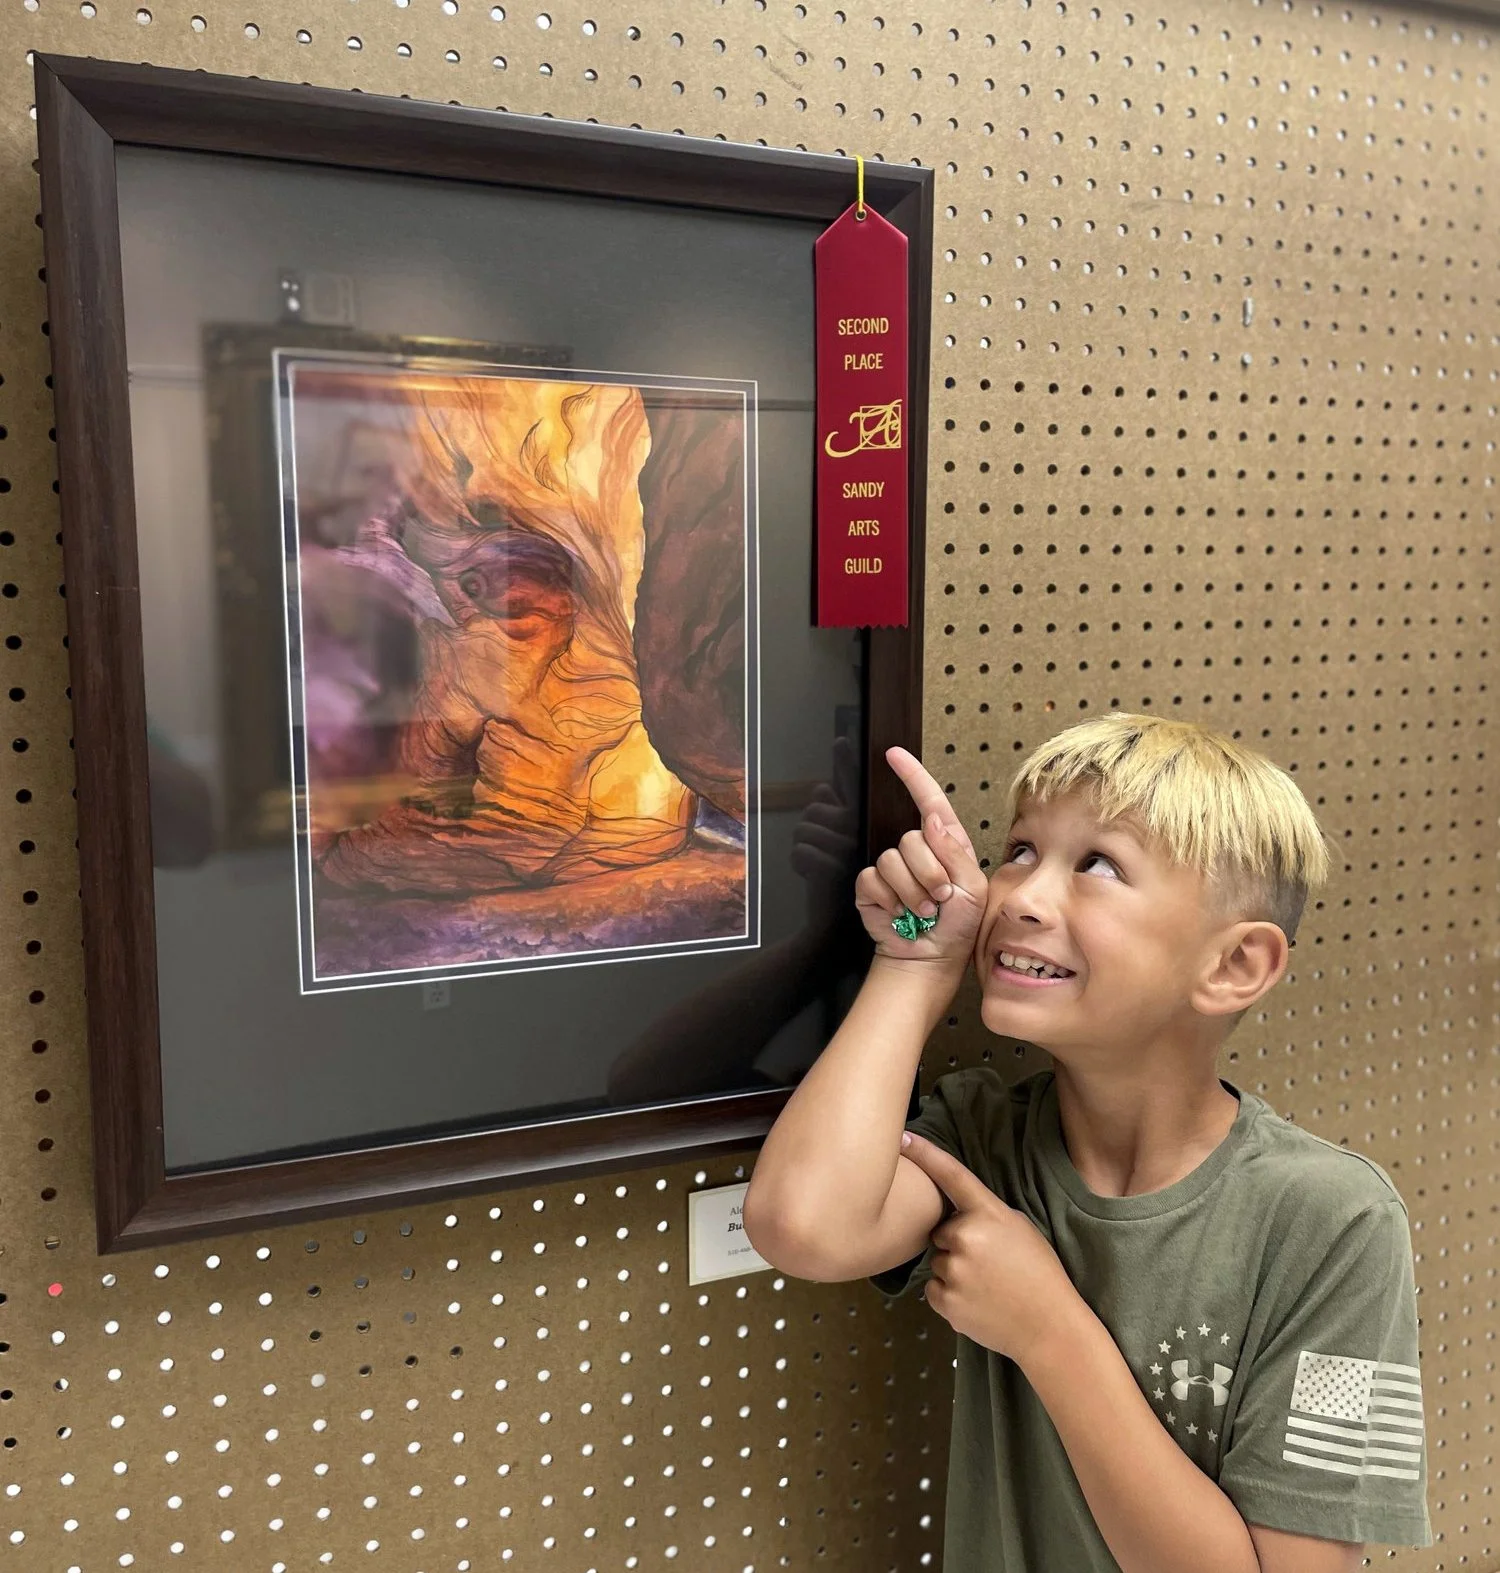
We went to the opening gala as a family and my oldest wanted to bet me $100 that I’d win 1st place in my category. I ended up winning 2nd place!

Sandy Visual Art Show

My painting of Buckskin Gulch took 2nd place in the watercolor category; which was a really awesome surprise. There were some really amazing paintings, in all of the categories.

It was really fun to walk around and look at all of the different art with my family. My kids scrutinized the watercolor painting that took 1st place (“Yours is way better, Mom!”). I spent a long time analyzing the intricate details of the painting that took 3rd place in watercolor.

Sandy Visual Art Show

Our mayor Monica Zoltanski (Sandy’s FIRST woman mayor!) and councilwoman Alison Stroud were there and I got to spend a few minutes with them talking about my artwork. Mayor Zoltanski told me about when she rode through Buckskin Gulch on horseback and it made ME want to do it too!

Sandy Visual Art Show

The evening was such a treat! I adored walking around and looking at all of the different artwork and I am planning to go back this week to look again.

Sandy Visual Art Show

Click on the image to watch the Reel.

If you’re local to the Salt Lake City area, stop by the Sandy Senior Center before October 7th and check out the exhibition. It’s open to the public and free.

While you’re there, fill out a paper listing your votes for People’s Choice Awards. Those winners will be announced at the end of this week. I wonder if there’s a cash award…

…ahem… my work is in the watercolor category.